Upload Files to Trimble Structures USA
Not version-specific
Tekla Structures
Not version-specific
Tekla PowerFab
Tekla PowerFab GO
Environment
United States (Imperial)
United States (Metric)
The preferred and most efficient method to send files to the local area support teams for Tekla PowerFab or Tekla Structures is the in-program Support Tools. By default, the support tools include product information, logs, and models or databases. Any additional supporting information (screenshots, PDFs, customized files, etc.) can be attached using the Add extra files button on the second page. This provides your Support Technician the information to promptly and effectively provide the appropriate support.
Tekla PowerFab Support Tool
The support tool in Tekla Structures is accessed in About > Create Support Ticket.
Image

By default, the support tool includes logs and the latest database backup. Any additional supporting information (screenshots, PDFs, import files, etc.) can be attached using the Add extra files button on the second page. This provides your Support Technician the information to promptly and effectively provide the appropriate support.
Unless your Backup default directory is set to the server Backup location, the Create Support Ticket will not include the latest database backup. If your File > Default directory for the Backup folder is set to your C: drive (if on the server, the C: drive could be appropriate) the tool will not include the latest backup. As your machine will not have a database to automatically backup, we recommend updating your default directory to the shared location your server is using.
It is possible to manually create a backup (or browse to the server’s Backup default directory) and add it and any other requested files using the add extra files portion.
Tekla Structures Support Tool
The support tool in Tekla Structures is accessed in ☰ (File) > Help Contact Tekla support
Image

By default, the support tool includes product information, logs, and models or databases. Any additional supporting information (screenshots, PDFs, customized files, etc.) can be attached using the Add extra files button on the second page. This provides your Support Technician the information to promptly and effectively provide the appropriate support.
File Sharing Service (Unable to Use Support Tool) - US Area Only
If those files are too large for email, please upload it to us using any file sharing service (our uploader, FTP, Google Drive, OneDrive, WeTransfer, et cetera). Please zip all the files and upload them to the preferred file sharing service. When it has been uploaded please let us know by stating where the files were uploaded to in the case email. If you are using a file sharing service other than our uploader please ensure to provide us the link in the case email.
If you are needing to create a new case, fresh email to tekla.support.us@trimble.com. Please include the product, version and service pack, any logs, models, database backups, or other files to assist in supporting the case.
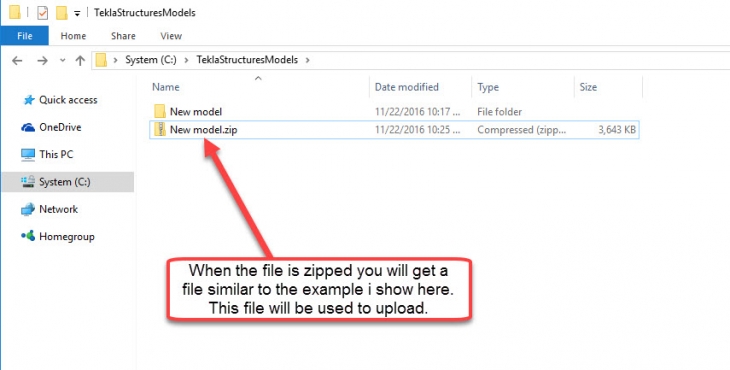
Zip Model Folder (Unable to Use Support Tool)
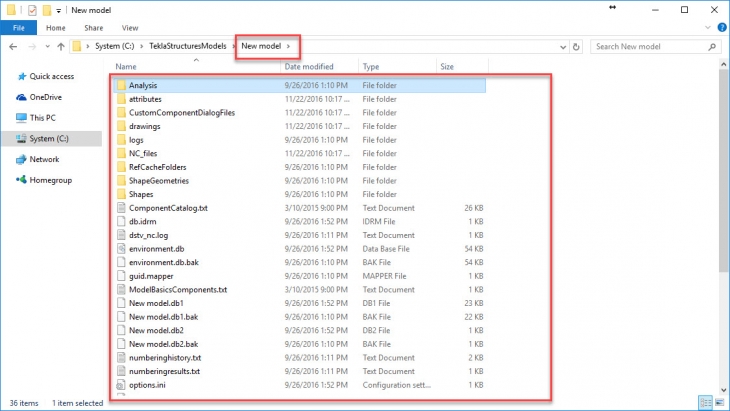
The best way to ZIP a model is to use the built in Windows Features. First, open the model folder on the ☰ (File) > Open Model Folder. Here, a file explorer window will open and you will see all the model files. The image below shows an example of this.
Image
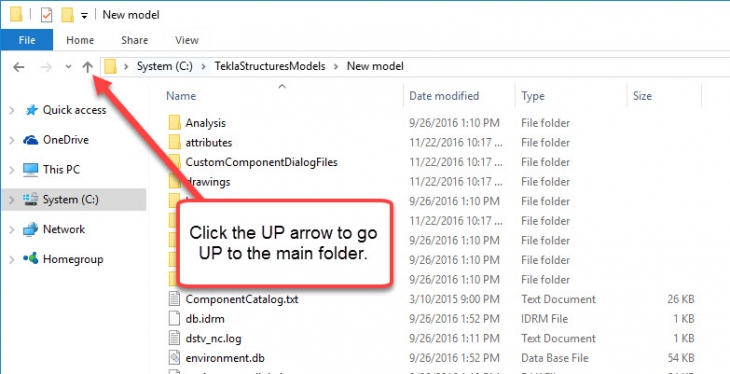
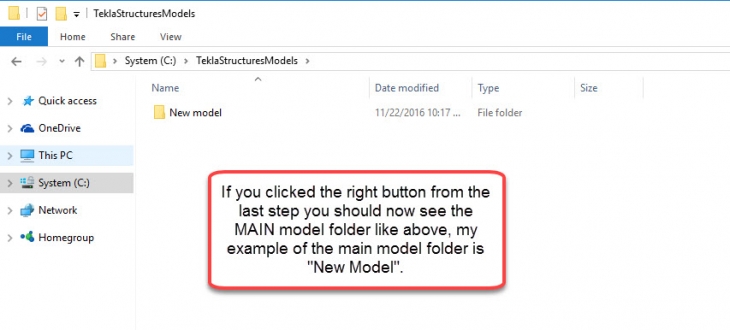
When you want to create a zip file of a main folder you have to click the up arrow shown in the image below to go to the main folder.
Image
Image
Next, to zip the folder right click the folder and click Send To > Compressed ZIP Folder. See image below for guidance.
Image

You should now have a .ZIP file in the same folder as your main model folder.
Image