Import DWG into Template Editor to create custom Title blocks
Not version-specific
Tekla Structures
Environment
United States (Imperial)
United States (Metric)
Creating the Template
For step-by-step narrated instructions and information about the entire process described below, see the linked video Import DWG into Template Editor to customize Title blocks.
-
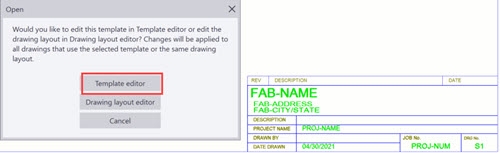
While Tekla Structures is open, access the Template Editor either from the File drop-down Menu> Editors> Template editor or within an opened drawing by double-clicking on an existing template (BOM, Title block, etc.) and choosing to edit the template in the Template editor. You can also follow these instructions on Using the Template Editor without opening Tekla Structures.
Image

Image
| In legacy versions, you can open the Template editor from within Tekla Structures via the Drawings & Reports > Template Editor… menu selection. Image
 |
|---|
- Once the Template Editor is open, select the icon (or File>New option) to create a New Template. When the New dialog box opens asking to select your Template type, select Graphical template, and click OK. See the linked article on Templates to understand the difference between Graphical and Textual templates.
Image

- All templates must be created inside a Template row so next, add a Row element to the template by clicking on the icon
Image

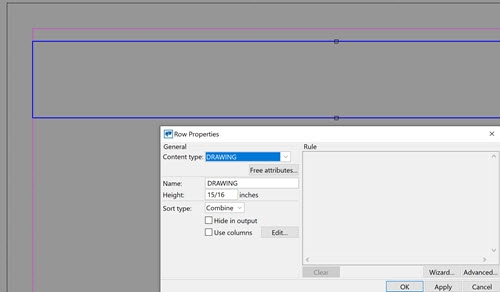
- As explained in the linked article, Content Types are object types in the product database which, in template row definitions, automatically filter out unwanted object types from the output template. In this case, select DRAWING as the Content-Type and click OK.
Image

Image
Once the Row is added, you can begin adding content inside it.
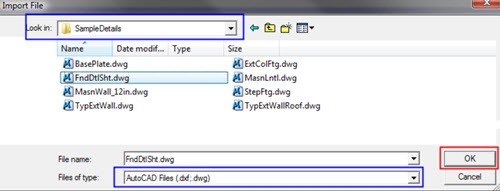
- From the Insert drop-down menu, select File... and browse to select the desired DWG file.
Image

Image
- Once the cursor activates, click to select a point inside the row to insert the DWG.
Image

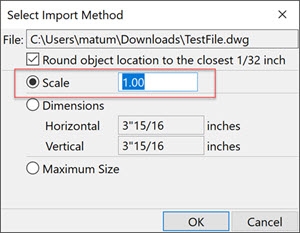
- In the Select Import Method window, choose the Scale option and use the default value of 1 initially. This value depends on the units of the DWG and the Template editor. Once the DWG is inserted you can verify that the size is correct. Often the needed conversion value is 25.4 (the conversion factor for millimeters and inches) as described in the linked article Drawing Export Scale Factor for DWG/DXF.
Image
If the DWG does not import:
|
- Once the DWG is imported, all of the drawing's elements are grouped for easier positioning. Select the group or "block," right-click for the context-sensitive menu, and select Ungroup.
Image

Once ungrouped, the elements can be edited or deleted.
- To pull data from the Tekla Structures model or drawing, you will need to add Value Fields into the template. To make it easier to navigate through the contents with your mouse, adjust the Grid's Density... and Snap settings through the Options menu.
Image

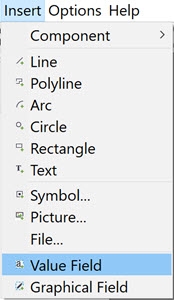
- From the Insert menu select Value Field and click inside the Row to place it on the drawing.
Image
Image

- Once the Value Field element is inserted, you need to select what data is to be linked. Such data corresponds to the properties in the model or drawing. You can modify the properties for value fields by double-clicking on an item or using the right-click menu when the item is selected.
Image

Image

- Add additional fields as desired.
Image

Lastly, when your data fields are in place, you can adjust the template size.
- Select the Row, right-click and use the necessary Crop options to remove excess space.
Image

Image

- You can save your newly created template to your current model folder, project /firm (if used) folder, or the system folder.
Image

For step-by-step instructions on how to add this or any other customized template into a sheet or Layout, see the linked article Create a Layout from Custom Templates. Also, see Create a new drawing layout, add table layouts and tables for this workflow in legacy versions.