Mix and Match Drawing Styles
Not version-specific
Tekla Structures
Environment
United States (Imperial)
Identify Which Templates You are Using
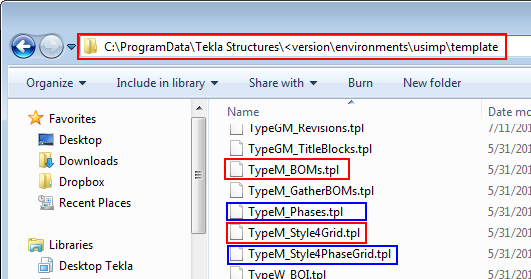
First thing you need to do is identify which template you are using. For example if you want use Style 4 Title Block templates with Style 5 BOM templates, you need to know/identify which templates are being used. You also need to know if there are any templates (like a neighboring revision template) that need to be modified as well. This will help you determine if you are going to modify the Title Block templates to become Style 5 or modify the BOM templates to become Style 4. You want to modify the least number of files, so determining this will help you choose.Here we will modify the Style 5 BOM template to become Style 4. Notice in blue there are 2 other templates that you may need to modify if you are using the Multi-drawing Phase Grid which appears at the left edge of the Multi-drawing’s BOM.
IMPORTANT: Copy the templates that you will be editing from the template folder to your Firm folder and modify them from your Firm folder.
Image
Edit Each Template in WordPad not the Template Editor
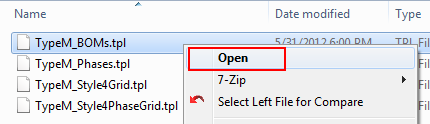
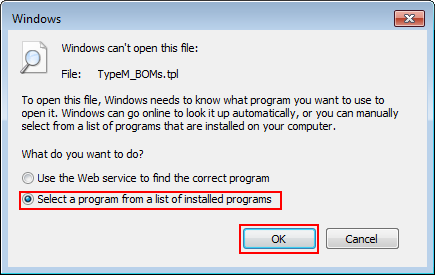
In Windows Explorer, open up your Firm folder and open the template template to be modified with WordPad. If it is not an available program you will need to select Choose Program and select it from the Program list.Image
Image
Image

Create a Replacement Plan
You will use the Replace command to change the Styles inside the tpl files. But first you’ll need to create a replacement plan. You cannot simple swap Style 4 and 5 around. You will need to jot down what you will be changing so that you don’t create a problem.You will need to get one of the Style “out of the way” so that you can modify the other Style to take its number.Here is this example’s replacement plan.
Image
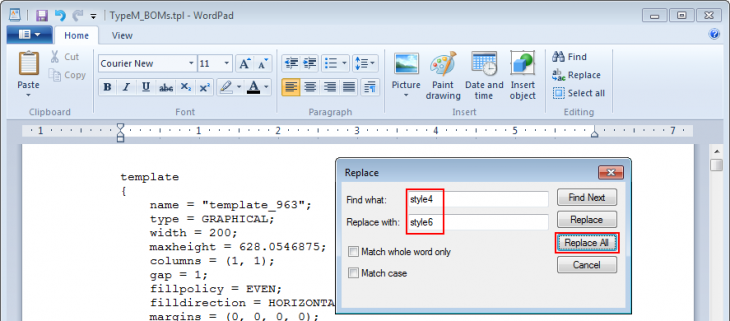
1. Style4 – change to Style6 (something that is not in use)
2. Style5 – change to Style4
3. Style6 – change to Style5
The end result is that Style 4 and 5 are swapped. Note, Style 6 was just temporary.
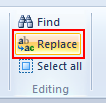
Using the Replace Command
According the 1st step in our replacement plan, we will change Style4 to Style6 as shown here.Image
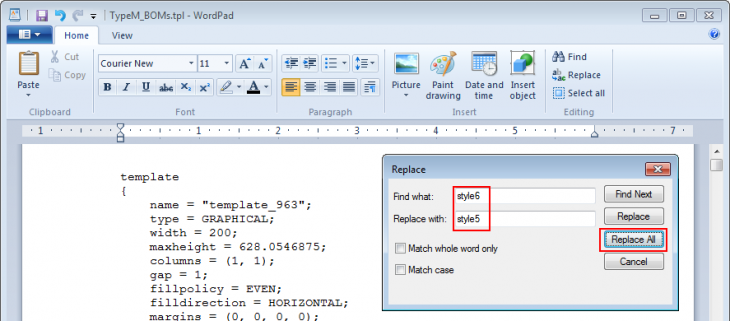
Then we will change Style5 to Style4.
Image

And last step will be to change Style6 to Style5.
Image
NOTE: Repeat this replacement plan in the other tpl files that you determined early also need to be modified.
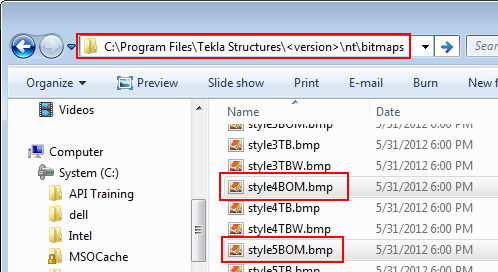
Preview Images (optional)
If you want the Preview images in the Project UDA dialog to reflect these style changes, you can open up the bitmaps folder and find the corresponding images. Use the replacement plan steps (or similar) to swap the names of these images.1. style4BOM.bmp – change to style6BOM.bmp (something that is not in use)
2. style5BOM.bmp – change to style4BOM.bmp
3. style6BOM.bmp – change to style5BOM.bmp
Image
NOTE: You will need to copy these modified images into each version of Tekla Structures that you will be using the modified templates in, including any new versions that you install and take into use.