Metal Stud Framing Components
2021
Tekla Structures
2020
Tekla Structures
2019i
Tekla Structures
2019
Tekla Structures
2018i
Tekla Structures
2018
Tekla Structures
Environment
United States (Imperial)
United States (Metric)
CATALOG NAME: Stud door; Stud frame; Stud Track cut tool; Stud wall infill; Stud window
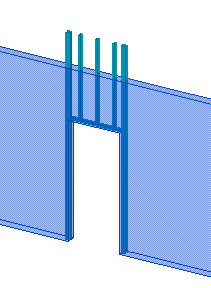
Stud door
TYPE: DETAIL
To add door:
1. Insert wall at desired location. (If wall already exists in model, simply skip step 1.)

2. Select the wall.
3. Pick the desired location along the wall.
If you want to change the part properties:
a. Select the component and double-click it to open the properties dialog box.
b. Modify the properties.
c. Click Modify.

Stud frame - Back to top
TYPE: DETAIL
To add stud frame to wall:
1. Insert wall at desired location. (If wall already exists in model, simply skip step 1.)

2. Select the wall.
a. Stud frame may be added with or without the infill studs.
If you want to change the part properties:
a. Select the component and double-click it to open the properties dialog box.
b. Modify the properties.
c. Click Modify.

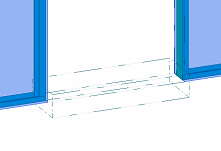
Stud Track cut tool - Back to top
TYPE: SEAM
To cut studs, or tracks:
1. Select component.
2. Select stud, or track to be cut.
3. Select an existing stud/track for a start location.
4. Select an existing stud/track for an end location.
a. With numbers 3 and 4 a cut is placed in the model. (This is simply a part cut in a custom component and meant for general design. If you are detailing the studs for the shop, you will need to use a different method to cut the part.)
If you want to change the part properties:
b. Select the component and double-click it to open the properties dialog box.
c. Modify the properties.
d. Click Modify.

Stud wall infill - Back to top
TYPE: SEAM
To add infill studs to frame:
1. Insert wall at desired location. (If wall already exists in model, simply skip step 1.)

2. Insert “Stud frame” component with infill stud option set to “No.”
3. Select the wall
4. Select start stud
5. Select end stud
a. (Numbers 3, 4, and 5 define the relationship to the wall.)
6. Click Middle mouse button
7. Define length of array by clicking two points
If you want to change the part properties:
a. Select the component and double-click it to open the properties dialog box.
b. Modify the properties.
c. Click Modify.

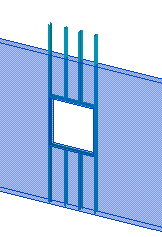
Stud window - Back to top
TYPE: DETAIL
To add stud window to wall:
1. Insert wall at desired location. (If wall already exists in model, simply skip step 1.)

2. Select the wall.
3. Pick the desired location along the wall.
If you want to change the part properties:
a. Select the component and double-click it to open the properties dialog box.
b. Modify the properties.
c. Click Modify.

Starting in v21.1, the above Custom Components are available in all US Environment Model Templates
Stud door
TYPE: DETAIL
To add door:
1. Insert wall at desired location. (If wall already exists in model, simply skip step 1.)
Image
2. Select the wall.
3. Pick the desired location along the wall.
If you want to change the part properties:
a. Select the component and double-click it to open the properties dialog box.
b. Modify the properties.
c. Click Modify.
Image

Stud frame - Back to top
TYPE: DETAIL
To add stud frame to wall:
1. Insert wall at desired location. (If wall already exists in model, simply skip step 1.)
Image
2. Select the wall.
a. Stud frame may be added with or without the infill studs.
If you want to change the part properties:
a. Select the component and double-click it to open the properties dialog box.
b. Modify the properties.
c. Click Modify.
Image

Stud Track cut tool - Back to top
TYPE: SEAM
To cut studs, or tracks:
1. Select component.
2. Select stud, or track to be cut.
3. Select an existing stud/track for a start location.
4. Select an existing stud/track for an end location.
a. With numbers 3 and 4 a cut is placed in the model. (This is simply a part cut in a custom component and meant for general design. If you are detailing the studs for the shop, you will need to use a different method to cut the part.)
If you want to change the part properties:
b. Select the component and double-click it to open the properties dialog box.
c. Modify the properties.
d. Click Modify.
Image

Stud wall infill - Back to top
TYPE: SEAM
To add infill studs to frame:
1. Insert wall at desired location. (If wall already exists in model, simply skip step 1.)
Image
2. Insert “Stud frame” component with infill stud option set to “No.”
3. Select the wall
4. Select start stud
5. Select end stud
a. (Numbers 3, 4, and 5 define the relationship to the wall.)
6. Click Middle mouse button
7. Define length of array by clicking two points
If you want to change the part properties:
a. Select the component and double-click it to open the properties dialog box.
b. Modify the properties.
c. Click Modify.
Image

Stud window - Back to top
TYPE: DETAIL
To add stud window to wall:
1. Insert wall at desired location. (If wall already exists in model, simply skip step 1.)
Image
2. Select the wall.
3. Pick the desired location along the wall.
If you want to change the part properties:
a. Select the component and double-click it to open the properties dialog box.
b. Modify the properties.
c. Click Modify.
Image

Starting in v21.1, the above Custom Components are available in all US Environment Model Templates
- CIP-Rebar Detailing
- Engineering*
- Precast Detailing (hidden)
- Steel Detailing (hidden)