Snap in orthogonal directions
You can snap to orthogonal points in models and in drawings using the Ortho tool. If you create objects that require you to pick multiple points, you can snap in orthogonal directions relative to the two previously picked points.
Note:
The Ortho tool has the lowest priority among snap points.
Even if you have activated the Ortho tool, but Tekla Structures detects any other possible snap point than an orthogonal point, Tekla Structures uses the found snap point instead of the orthogonal snap point. If there are no other possible snap points found, then Tekla Structures uses the orthogonal snap point.
Activate the Ortho tool
Before you can snap in orthogonal directions, ensure that the Ortho tool is active. The letter O in the status bar at the bottom of the Tekla Structures main window indicates that Ortho is active.
If Ortho is not active
-
press O to activate it
-
alternatively, click and select the Ortho check box.
Snap to orthogonal points
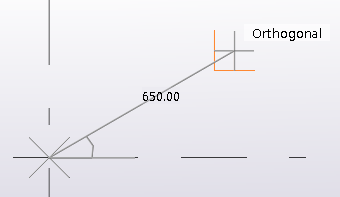
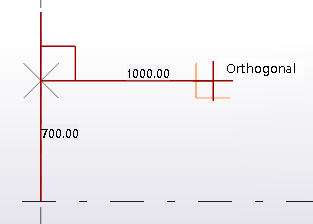
Use the Ortho tool to snap to the closest orthogonal point on the plane (0, 45, 90, 135, 180 degrees, and so on). The mouse pointer automatically snaps to positions at even distances in the given direction. This can be useful, for example, if you need to place marks in a consistent manner in exact locations in a drawing.
-
Run a command that requires you to pick points.
For example, start creating a beam. Tekla Structures displays an angle symbol to indicate the direction of snapping.
The snapping precision depends on the current zoom level.
The angle interval depends on the settings in the Model snap settings dialog box.
-
Click the left mouse button
to confirm the snap position.
Tekla Structures creates the object. For example:

Snap in orthogonal direction relative to previously picked points
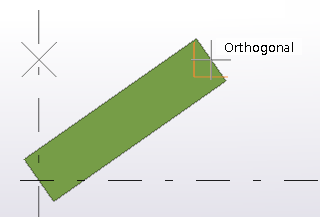
When you create objects that require you to pick more than two points, for example when you create a polybeam or a contour plate, you can snap in orthogonal directions relative to the two previously picked points. This can be useful, for example, if you need to create a rectangular slab that is on the view plane but not along the x and y axes.
-
Move the mouse pointer in
the model to see the angle symbol.
When the snap is orthogonal to a work plane axis, the color of the angle symbol follows the color of the work plane axis: red for x-axis, green for y-axis and blue for z-axis.
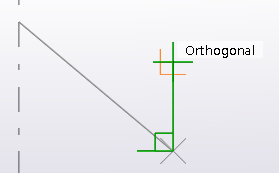

When the snap is orthogonal to the previous points, the color of the angle symbol is black.
-
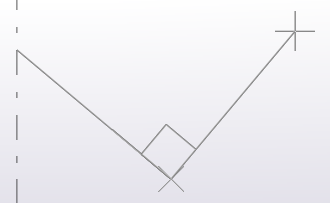
Pick the rest of the points.
Tekla Structures creates the object. For example:

Set a temporary reference point
You can set a temporary reference point to be used as a local origin when snapping in models and drawings. Typically the Ortho tool and the Snap to perpendicular points snap switch use the reference point information.
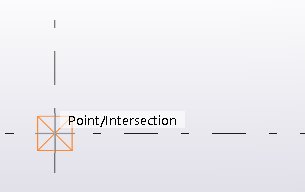
The reference point information is automatically set to the last picked point, and shown as a gray cross. When you interrupt a command, the reference point information, meaning the last picked point, is cleared. If you need to use the reference point, set the temporary reference point manually.
-
Pick the start point.
-
Hold down the Ctrl key and pick a position.
Alternatively, right-click and select Define temporary snap reference point and pick a position.
A gray cross indicates that this position is now a temporary reference point. You can continue snapping from the temporary reference point.
-
Release the Ctrl key and pick the end point.
Tekla Structures creates the object between the start point and the end point. For example:
Settings for the Ortho tool
Use the settings in the Snap settings dialog box to set the angle interval for Ortho. Use the Angle interval or the Custom angles option.
The default angle interval value is 90 degrees.